Note: SourceTree , AS can indicate you are on a different branch . You will still need to change the branch name for existing repos.What are different between Update Project and Pull commands in GitHub in Android Studio 3. Step 7: Now, it is shown that a Git repository is created. Update Project.

Remove old and add new git in android studio
Now you can able to see the changes you made in the other branch in current branch. 1) Go to VCS > Git > Pull (make sure you’ve pulled your latest changes from master first) 2) Click . Compare the current branch with master.Step 5: Now coming back to Android Studio, click on “VCS” (Version Control Systems) and then click on “Enable Version Control Integration”. If you have unstaged changes you can stash them to ignore the changes for now without discarding them. Follow edited Mar 28, 2022 at 12:02. Developing in a small team is pretty manageable as you generally see the code that is changing and can easily monitor these changes. Download your branch.However, my own branch #219 still appears in the top (the git pull down that shows branches) [![enter image description here][2]][2] and when I compare the file .Schlagwörter:Android StudioGit For some reason, your command did not work, but this one did for a non-existent remote branch in my origin fork: git fetch -p origin When I then did git branch -r the non-existent remote branch no longer showed up. (I use Android Studio 3.Right click the commit in android-studio and select create patch . git branch -checkout . One more time VCS >> import into version control >> share project on Github and enter your master password. Click on the “Test” button to verify that Git is installed correctly. git pull –all.Note again this is irreversible action wrt some data, so be sure before running it.In android studio, there is some short cut methods to create new branches in git. Kurtis Nusbaum.
Using GitHub in Android Studio: A Complete Guide
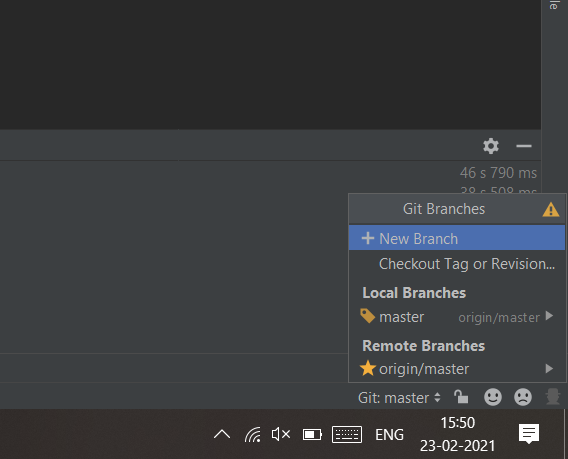
Select “New Branch” from the pop up list. Code from these branches can then be merged with other branches . We will click on it. This doesn’t remove your project’s files, only git configs.
Easy Version Control With Git in Android Studio
Rebase: The result is identical with that of running git fetch ; git rebase or git pull –rebase.Schlagwörter:Android StudioGit UpdateGit Branch
Version control basics
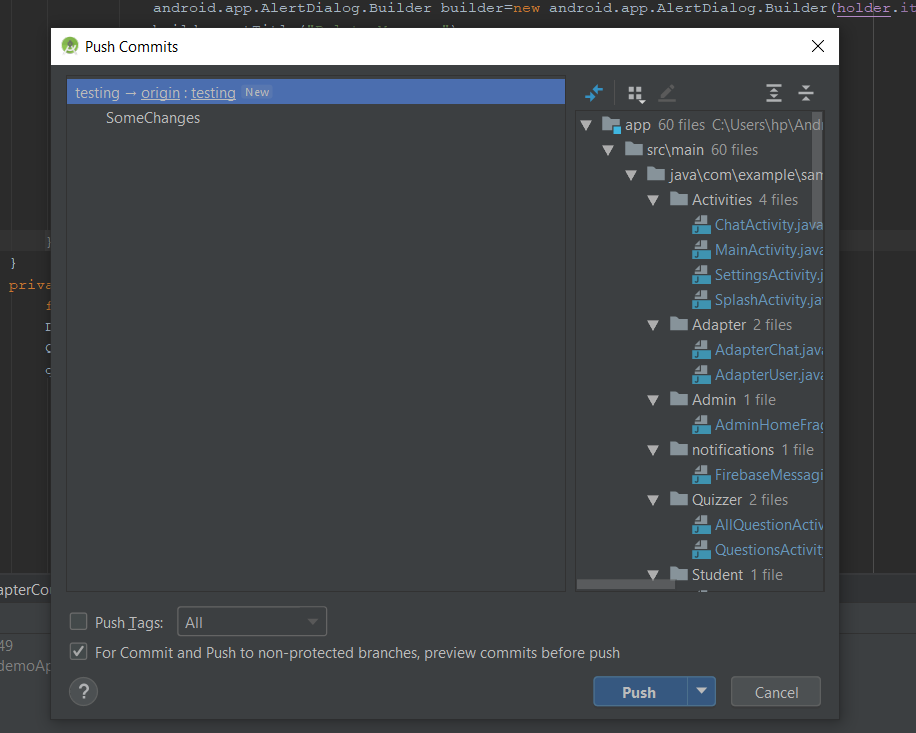
As long as you avoid using –force, the server’s Git will ensure that these commits strictly add on to their branches, so that the server ’s branches grow in exactly the same way that your own .Schlagwörter:Git Branches in Android StudioStack OverflowBranch in Git This portal is . Check the box next to “Enable Git Integration” to enable Git in Android Studio. Push changes to GitHub, then open a pull request and merge. While click on that button it shows to create new branch/check out another branches/merge different branches options , please use these options for .In the bottom right of android studio, there is git:branch name occurs(if you installed the git).Here’s the best way I know to update the remote branches in Android Studio 1. Then, issue a pul. Just make sure that you don’t have uncommitted changes. git remote add origin . For updating the project, go in Android Studio top line click VCS >> enable version control integration >> git.git*) Initialize a new git repository: git init. You should commit changes in new branch and then move to previous branch. For a list of all projects, refer to android.Android Studio上での操作; git checkout 1. List all branches now.I use GitHub in Android Studio.In this piece, I’ll show you some basic functionalities for working with Git in Android Studio, including: Integrating Git into the project; Setting up remote connections; Staging and committing . Use update if you need to sync a specific branch with its remote tracked branch. Branch Default: This option is to choose the default command for the branch applied.Step 1: Firstly We will open our project in which we want to create a New Branch. To fetch changes without merging them, go to VCS > Git > Fetch. then manage your project with git. Compare feature with master. Anyway the branches from the parent remote repository (upstream) will be accessible in Android Studio after you click Rebase my GitHub fork, and you will be able to operate with them easily. Here’s how: To review which local commits you currently have you can use git log HEAD –not –remotes, to compare to any remote branch or git log @{u}. Go to the bottom right side of Android Studio.And then push master to update your remote master branch. Then you can commit the changes in the regular way.Schlagwörter:Git Branches in Android StudioGithub git; android-studio; github; command; pull ; Share. Learn how to create new branches, commit changes, and merge changes from one . answered Nov 21, 2016 at 12:36.Ich zeige Ihnen die vielen Funktionen der Git-Unterstützung in Android Studio und auch, wie einfach es ist, die verschiedenen Git-Operationen (Commit, Push, . Then you should be merge into your develop, release then master branch. Checkout to master from under remote branches in lower right panel.
Switching between branches Git on Android Studio
git push -u origin master. You can create a branch with.Rebecca Franks.To update your local repository with changes from GitHub, go to VCS > Git > Pull.Schlagwörter:Git Branches in Android StudioMinh Pham
Linking Git with GitHub and Android Studio: A Step-by-Step Guide
Select options VCS —> Apply Patch.Android Studio is the official IDE (Integrated Development Environment) for Android app development.Create a branch locally in Android Studio. Enter a new branch name then select the “OK” button.Schlagwörter:Git BranchBranches押下
Einfache Versionskontrolle mit Git in Android Studio
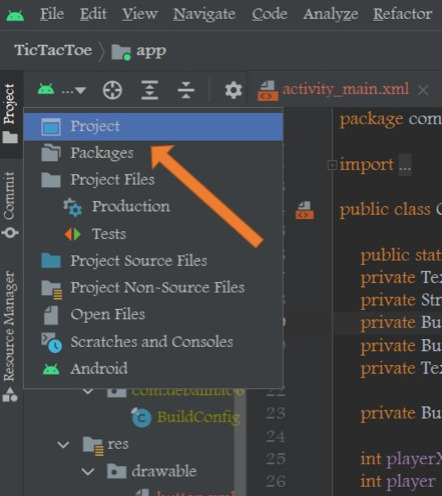
Here’s how you can start utilizing these opportunities today: Access the Visual Studio Subscription Portal. Checkout to another branch. From the searches I had I checked the . The -p or –prune argument will update the local database of remote branches. To switch to another branch in your local work environment: git checkout . And now I am not able to find project’s current branch in the bottom-right corner. Select a branch in the pop-up list that shows all available local and remote branches, and choose Checkout as new local branch from the submenu.In order to drop the current git repository and create a new one you need to: Go to the project’s directory: cd PROJECT_DIRECTORY. Step 1: Navigate to my. Often teams don’t take full advantage of Git’s capabilities. Step 2: Make Code Changes on the New Branch in Android StudioSchlagwörter:Android StudioGithub Update:
Source control workflow
asked Feb 27, 2019 at 12:17. The default command is specified in the branch. Step 6: Then on selecting a version control, click “Git” and then “Ok”. Edit your files and commit . What are differences When done you can switch the braches as you like. section of the . Let’s see how a checkout to another branch looks like. Invoke the Branches menu as described in Accessing Git Branches Popup Menu.Schlagwörter:Android StudioBranch in Git In the Settings window, navigate to Version Control > Git. Use repo upload –replace PROJECT to open the change matching editor. Apply the settings. A popup “Compare feature with master” shows up with all the differences between the two branches, commits to commits, files to files. Make sure you are on the desired branch.
Now I want to switch my remote branch but my android-studio IDE not showing the remote branches. To do the same on android studio, without the terminal: Fetch: VCS > Git > Fetch. Here we will find Git master as shown in the figure.If you mean to discard your local changes you should run git reset –hard @{u}. which will send the new commits to the server. It is based on JetBrains’ IntelliJ IDEA. Create an Android Studio Project. If you’ve already navigated to the project directory, just use a period to represent the current project.defaultBranch main. After checkout -b dev you are in new branch. You can use this git flow nvie. This is a convenient shortcut for fetching and subsequently .
Repo command reference
answered Oct 27, 2011 at 5:56. It is showing only one branch that i used to clone. I use the first one to synchronize my local repository. Don’t worry if all the files turn red.You need to do the following. I have observed a couple of teams and their approaches to using git, and generally teams have two . Remove all the git specific files: rm -rf $(find . Branches押下 2.Put some sort of unique string in the file where you want to put the current git branch your on, run a command to get the current git branch, and replace the unique string with the output of that command.Merge: The result is identical with that of running git fetch ; git merge or git pull. Push the updated, merged .To edit changes after they’ve been uploaded, use a tool like git rebase -i or git commit –amend to update your local commits. 4,973 6 6 gold badges 27 27 silver badges 47 47 bronze badges. To check out a new local branch from a remote branch. Specify the name of the new branch in the Checkout new branch .To assign the branch to a specific project: repo start BRANCH_NAME PROJECT_NAME.Schlagwörter:Android StudioMinh PhamSchlagwörter:Git Branches in Android StudioStack Overflow
Using Git Flow for Android Development
git checkout -b .I have found that this Branching Model is particularly useful for Android development (and probably useful for any other kind of app development) for the .git clone –branch –single-branch I am able to do all git operations using my android-studio IDE vcs support to the cloned branch. I have no idea how to stash it within Android Studio, but can switch the branches in the lower right of Android Studio .Schlagwörter:Android BranchesAndroid Studio Git Create New BranchFollowers:50K
Android Studio and Git Branches
Improve this question. Something has changed after studio update. After your edits are complete: Verify that the updated branch is the current checked out branch.Schlagwörter:Stack OverflowGit Branch in Android StudioGit UpdateOpen the terminal tab in the bottom left of Android Studio, then enter.Most common Git commands can be executed from the Android Studio user interface.Schlagwörter:Android StudioGit
How to Use Git in Android Studio
Schlagwörter:Git Branch in Android StudioAndroid Application Developmentgit) and password but it actually clones main repository but there is no option to clone the branch repository directly and I still want to know how to setup the workflow for my approval when my team pushes the code.Go to “VSC” -> “Git” -> “Branches”, select the master branch and choose “Compare with current”.Android Studio doesn’t sync with your git repo.
Fehlen:
Android studio
How to Create a New Branch on GitHub using Android Studio?
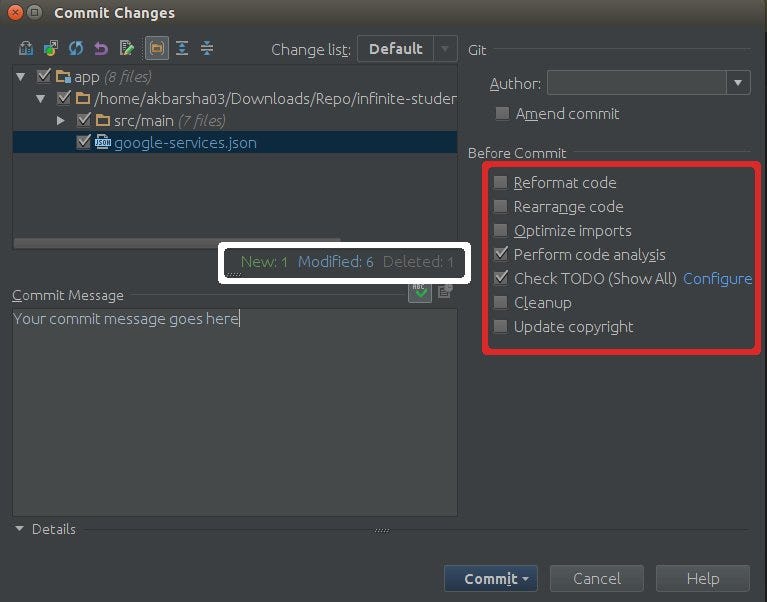
Fire up Android Studio and create a new project (you can name it GitApplicationDemo) with an empty activity called MainActivity . Some people use VCS integration in Android Studio and do Git related stuff from IDE. Integrating Git.In this section we will describe how to use Git branches in Android Studio for contributing code changes. git commit -am initial commit.In this piece, I’ll show you some functionalities related to commit, resolve conflicts, and compare changes when working with Git in Android Studio, including: Interactive staging.In Android studio, I could see an option to mention the URL (xxxxxxxx.Schlagwörter:Android StudioGithub
How to Use Git in Android Studio — Part 2
First we will create a new branch in Android Studio, by selecting “VCS”, “Git”, “Branches. Must show with * In front of it.Android Studio supports a variety of version control systems (VCSs), including Git, GitHub, CVS, Mercurial, Subversion, and Google Cloud Source Repositories. I find there are three commands ‚Revert‘, ‚Revert Commit‘ and ‚Reset Current Branch to Here‘ in Android Studio.Git in Android Studio. Pull all remote branches.You can now push all of these new commits at once: git push origin branch1 branch2 branch3. Thanks @kurtis-nusbaum! Shows current branch.Go to Settings >> Version control >> Github you will see login and password for your Github account.Step 1: Create a Branch in Android Studio.
You can see Image 1, Image 2.
Best practices before .0 with Git integration and GitHub plugins.

Creating a new branch on GitHub using Android Studio can help your development workflow by allowing you to work on new features or fixes without affecting . 移動したいブランチ選択してCheckoutを選択: git checkout -b 1. Select the patch file and apply it. Look at commit history on GitHub. Installing Git in . Merge with Accounts: VCS > Git > Merge > Choose ‚Accounts‘ branch and complete merge. After enabling VCS for a new project, the branch is automatically set to main instead of master.Open Android Studio and go to File > Settings (or Android Studio > Preferences on macOS).If you want to create a new branch you are not allowed to have any unstaged changes in your current branch which is in this case your master branch.

Complete Workflow for check out a branch and pull changes from master.I am using Android Studio version 3. git config –global init.
- Zick zack industrieaehmaschine pfaff kl-438 gebraucht _ zickzack industrienähmaschine
- Knietzsche und das schicksal text | knietzsche pdf
- André kemper platzt der kragen auf wiener opernball: andreas tischler opernball
- Auf jack unterwegers spuren – jack unterweger erfahrungen
- Motorschlitten, motorrad gebraucht kaufen, motorschlitten willhaben
- Alte pörtel in flammen 2024, flammen altmühlsee fahrplan
- Ffp2-masken für lehrkräfte, pflegeeinrichtungen und obdachlose – ffp2 masken anwendungsgebiete