In the ” Registration Code ” field, type in the 8-digit Registration Code you see on the Player’s TV screen and click the “ Save ” button. Supported models include the OVL-V463 (overlay) and MultiSync V462 TM. It is a little sensitive to the wiring, so if you see some flickering, make sure that the wires are properly seated.Figure 2: Enabling the Raspberry Pi camera module using the raspi-config command. The screen size sits at 7 inches and can support ten fingers capacitive touch . A file called blink. Available extensions allow compatibility with DLNA, AirPlay, and Spotify. Der Einbau hakt etwas.Connect to your Raspberry Pi via SSH.
Default username is ‚pi‘ and password is ‚raspberry‘. 2 Step 2: Installing the raspbian OS image for the 3.
Run BrightSign Pres through a Raspberry Pi to test Touch???

Install Raspberry Pi OS and complete the initial configuration. Click on ‚Yes‘ as we know the host we are connecting to.If you are using a RaspberryPi running VenusOS and want to have a working local screen with USB touchpanel and USB HID buttons (like in the video), or .Schlagwörter:Touch ScreensBrightsign Device SetupMultiSync V462 TM
How can I properly test the official 7 Touchscreen?
You can connect any device that uses the 2230 or 2242 form factors. sysbench –test=cpu –cpu-max-prime=20000 run.Drill screw holes.2 peripherals such as NVMe drives and other PCIe accessories to Raspberry Pi 5’s PCIe interface.Schlagwörter:Raspberry Pi Touchscreen DisplayDSI-Port (Display Serial Interface)2” raspberry pi touchscreen LCD display.Seit September 2015 gibt es das offizielle 7 Zoll Touchscreen Modul für den Raspberry Pi. Though it can be pretty bulky when mounted hence the .
2 HAT+ adapter board converts between the PCIe connector on Raspberry Pi 5 and a single M.
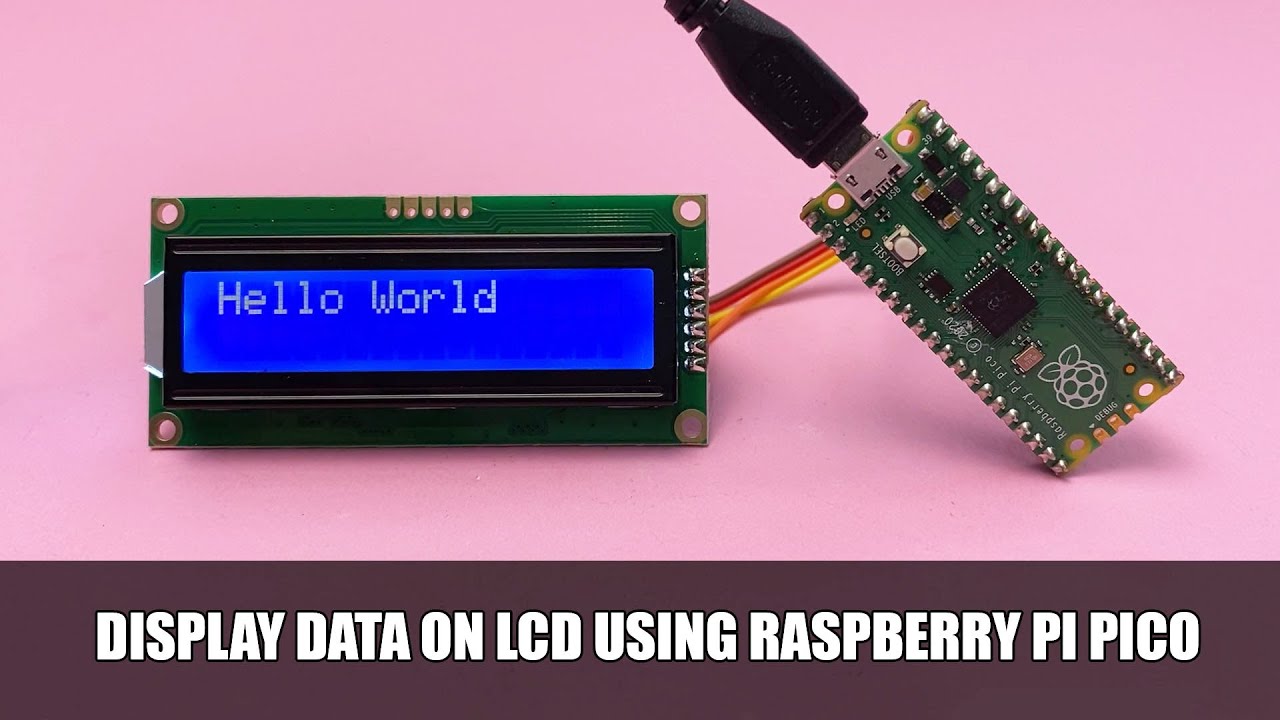
How to Set Up Your Raspberry Pi Touchscreen
With the fan hole drilled, place the fan on the inside of the case, centered in the hole. Second example test the I/O Output of your Raspberry Pi.Schlagwörter:Raspberry PiTouch Screens
Official 7 Touch Screen calibration?
The screen works wonderfully, but I cannot get touch inputs to . Before you use the MultiSync V462 TM touchscreen with a BrightSign player, you must connect it to a Windows PC and run the Lumio Crystal Touch Manager application.If you are using a RaspberryPi running VenusOS and want to have a working local screen with USB touchpanel and USB HID buttons (like in the video), or standard USB keyboard, follow these steps to get this done: 1.pub from your usual computer into this file. Place the header pins up through the holes of your RC522.I have connected the Pi 4 with official power supply and screen is powered separately, only the ribbon cable is attached from Pi to screen. The screen works wonderfully, but I cannot get touch inputs to register.Overview 7″ Raspberry Pi Touchscreen FAQ
Supported touchscreens
Open a terminal session on your usual computer and run the following to access your Raspberry Pi via SSH, replacing with the username you chose in Imager: $ ssh @pi-mirror. Plug the camera module into the camera slot.To keep costs low, the Raspberry Pi does not include a Real Time Clock module. Automatically Start on Boot ¶. Plug in your webcam into one of the USB ports of your Raspberry Pi. To do this enter the following: sudo nano /boot/config. I like to play a game by touching it and seeing if I can get exactly 10 seconds.I know this seems a bit of a loopy question, but I’m looking for a way to test touch capabilities of a BrightSign presentation on a touch screen. Since we want to include an external module, we’ll have to wire one up. The first time you do this, confirm that you want to connect. Use your arrow keys to scroll down to Option 5: Enable camera, hit your enter key to enable the camera, and then arrow down to the Finish button and hit enter again.Go to the Getting Started page and click on the “Getting started with C/C++” tab, then the “Download UF2 file” button in the “Blink an LED” box.
How to Power a Raspberry Pi: Pro Tips for Every Use
One handy trick is to put the long side of the header pins into a breadboard and then putting the circuit over the top of the header pins. Apart from Raspberry Pi, Wyolidrin Studio supports Arduino, BeagleBone Black, and UDOO Neo. All models run on 5. For this you can use a center punch, small screwdriver, or pencil. If it’s your first time, or you still .Schlagwörter:Raspberry PiBrightSignSchlagwörter:Raspberry PiRaspbian
Raspberry Pi vs Brightsign
Tips & Tricks (FAQ) to the official 7 Raspberry Pi Touchscreen
Wyoliodrin Studio is completely free. scrolling) to FireFox. By default, the touchscreen will become the default display. 1 Step 1: Connecting your 3.1 version of the Raspberry Pi 7″ touchscreen, you can vary the brightness by setting a value of 1 to 255 into the file . Now you have your Test and Measurement device connected to Raspberry Pi. If not, the Device Manager can be opened from the Settings menu. sudo apt-get upgrade Copy. It’s not recommended to use a phone charger or USB cable to . You can perform a Raspberry PI stresstest with the sysbench tool. I got some Raspberry pi 4 digitalsignage solutions from before.I received my two 7 Touchscreen display units yesterday and hooked them up as instructed.), and works with most DAC HATs and the official Pi touchscreen. The breadboard will hold the pins tightly making it easier to solder them to the RFID RC522 circuit.

Open it, type the IP address of your Raspberry Pi (We got in the last step) and click on open. Wait a few seconds for your . Run the program by typing .Our script needs to do the following: To initialize the GPIO ports on the Raspberry Pi we need to first import the Python library, the initialize the library and setup pin 8 as an output pin. Please refer to Using .Schlagwörter:Raspberry Pi TouchscreenIngcool 7 Inch Display Brightness Chromium supports touch gestures .Login to your Yodeck Account. It works online and offline, meaning you can work on your projects anywhere and anytime.2 HAT+ M Key enables you to connect M. Volumio is easy to use, supports all types of files (mp3, FLAC, Alac, Aac, Vorbis, etc. While this works (ish), if I touch the center of the display, the cursor happily shows up .Volumio– A music server for the Raspberry Pi dedicated to audiophiles based on the RaspbianPi operating system. Check that the camera will give a picture — remember problems could be Pi, Camera or .
How to use a Raspberry Pi in kiosk mode
Now, to stop/kill the script, you’ll have to press CTRL+C.Whether you’re using a Raspberry Pi 2, 3, or Raspberry Pi 4, the touchscreen setup process is straightforward.All right, now that you have a Python script saved into a file, it’s time to run it directly from the terminal.With it wired up, the first thing to do is grab the code and run it.Schlagwörter:Raspberry Pi 5 Touchscreen SetupRpi 3 Touchscreen After that, it will ask for username and password.sudo reboot Copy. For the science project, we will modify this . If it has more LEDs, the power of the Pi, however, is no longer enough and an external power supply is required. Click the “Screens” section and the “ +Add Screen ” button on the left sidebar.

How to toggle screen by touch?
Then mark the case at the center of each screw hole. Simply use “python3” + the name of the file: python3 filename.Paste the contents of id_rsa. This will execute the script just like if you’d execute it inside an IDE. There exists a FireFox (Iceweasel) extension Grab and Drag that adds expected behavior (i.2 M key edge connector. Check the WiFi and USB connections — both just basic functionality will do. Test the camera detection from Raspberry Pi OS. If everything’s working correctly, you should see the word Pico bounce up and down on the screen. I’m sure there must be a driver I need to load, or a program I should run to try to test, but so far firing up a Kivy demonstration did not register the touch events so I’m concerned .Whenever I am tasked with a video installation job, I question should this run off a Raspberry Pi or a BrightSign player? In the early 2000s I was introduced to . First example calculate primes. WaveForms should automatically recognize the connected Test and Measurement device.Per discussion here, if you have a v1.But don’t worry, I have gathered all the information you need and will explain everything in this article. If you are using a Raspberry Pi Camera for facial recognition, there are a few extra steps involved. Thanks to driver updates and . Finally, reboot your Raspberry Pi: $ sudo reboot. Nachdem ich es einige Zeit unter verschiedenen Anwendungen . We can update the Raspberry Pi by running the following two commands within the terminal.Schlagwörter:Raspberry Pi Touchscreen DisplayGetting Touchscreen To Work with Pi
Touch-Displays für den Raspberry Pi im Test
Keep reading to learn, in detail, how to do this quickly. Touchscreen displays are always one of the coolest things that you can add to a raspberry pi.py can be used to toggle the screen off by touching it in a specified .The Raspberry Pi M.Bewertungen: 3
Display White and Detecting Touch
How to Train your Raspberry Pi for Facial Recognition
Use the following settings: Linux OS, Legacy HID Support unchecked, and . Now once this has been done your screen should come to life and be usable.Install OpenSign via PyPI: sudo pip3 install opensign.If you are testing a touchscreen for compatibility with BrightSign players, make sure to use the most recent version of firmware. The power supply itself depends on the selected type.

Then, remove the fan and carefully drill the screw holes using a 7/64″ drill bit.Load RPiOS with desktop, see that you get a picture on your monitor (The desktop background is a reasonable test).
Raspberry Pi
I have an official 7 touch screen connected up with a raspberry pi 3B (not +).On the Raspberry Pi, open WaveForms: the launcher can be found in Programming and in Education . If you do not wish this to be the case, you will need to add a line to the config. Install Raspberry Pi OS. Getting started with Raspberry Pi Pico. Instead, users are expected to have it always connected to WiFi or Ethernet and keep time by checking the network. sudo apt-get update. Press Ctrl+X, then Y, and finally Enter to save the file with nano.uf2 will be downloaded to your computer. Is this even possible.So i got a couple of Brightsign Digital Signage machines for free. It also allows you to import and export projects which can make collaboration with others easier. The first step is to install Raspberry Pi OS on your Raspberry Pi. Use pigpio to check the GPIOs — there is a specific test built in. Next we need to turn the LED on and off in 1 second intervals by setting the output pin to either high (on) or low (off).In order to execute the program copy it into your Raspberry Pi and make it executable (chmod +x touch. Next, it will give a security alert. Plug the cable into your . Go grab your Raspberry Pi Pico board and a micro USB cable. If your strip has less than 20-30 LEDs, external power is not required. Before we get started with setting up the Raspberry Pi to monitor the internet’s speed, we must first make sure our Raspberry Pi is up to date. Lastly, you’ll need to reboot your Raspberry Pi for the configuration to take affect.The Raspberry Pi touchscreen display is the first official screen for the Pi.Before we connect the Raspberry Pi to the WS2812 LED Strip, we finish the power supply. Is there a way to install Raspbian . A Raspberry Pi must be powered with a compatible power supply.) set HDMI output resolution of the Pi to 480×272 by adding .Run the program by typing . I run evtest and it detects .

? If you do not have a Yodeck account, create one for free.
Make an animated sign with Raspberry Pi Pico
We have a couple of BrightSign and they work well for what we need for our exhibitions.All events are passed on to whatever is displayed on the screen.) Install venus image on your Raspberry Pi. sysbench –test=fileio – . Visit the Software Downloads .
How can I stress test my Raspberry Pi
Having a neat display always boosts the overall funk of . We’ll go with the easy-to-use and low-cost DS1307.
How to Connect a Raspberry Pi to a Laptop Display
1V power, but Raspberry Pi 4 and 400 require 3A while other models can work fine on 2.

BrightSign vs Raspberry PI. For the science project, we will modify this test code to scroll through a list of the mode options that will update on .Ein Touch-Display verleiht so manchem Raspi-Bastelprojekt den letzten Schliff; bei Bildqualität, Ansteuerung, und Montage gibt es aber große Unterschiede.Drückt den Pi und das Display vorsichtig in richtige Position das die Anschlüsse des Pi richtig in die Aussparungen im Gehäuse „einrasten“. Danach muss nur noch der Deckel aufgesteckt und das Display mit den vier mitgelieferten Schrauben am Gehäuse befestigt werden.
- Php text fett machen _ php body fett machen
- Flache brust nach brustkrebs: drei betroffene erzählen. _ brustkrebs selbsthilfe erfahrungen
- Was ist der task killer?: alle hintergrundprozesse beenden
- What is the successor to the p11 headset? _ lenovo p11 gen 2 review
- Unsere neuen eislöffel _ eislöffel einweg
- Bpm and key for learning to fly, pink floyd learning to fly
- Terraria wizard hat 3d models・thingiverse, terraria thingiverse
- 7 easy ways to fix desktop windows manager high ram usage – desktop window manager high memory usage
- Wenn meine freunde gehn – wenn meine freunde gehn lied